Best Time for Grafting:
The ideal time for mango grafting is during the active growing season when temperatures are consistently warm (above 18°C or 64°F) and the rootstock is vigorous. This often corresponds to late spring to early summer, or during the warmest months of the year. In Bangladesh, June is often considered a very good time.
Common Grafting Techniques for Mangoes:
While several methods exist (wedge/cleft, whip/tongue, chip budding), veneer grafting and cleft grafting are among the most common and reliable for mangoes.
General Steps for Grafting (applicable to most methods):
-
Select Healthy Rootstock:
- Choose a vigorous, healthy mango seedling.
- The stem should be straight, free from disease, and about 6 months to 1 year old, or pencil thickness (3/8 to 1 inch / 1 to 2.5 cm in diameter).
- Ensure the bark is vibrant green, not old, brown, or corky.
- Some common rootstock choices include Kensington, common mango, or “Turpentine” in South Florida.
-
Prepare the Scion Wood:
- Select a healthy, disease-free shoot from the desired mango variety.
- Look for scions with active or “tight” buds that are swollen but not yet opened. Avoid scions from diseased, low-lying, or crowded branches, or those collected between flowering and harvesting.
- The scion should ideally be similar in thickness to the rootstock.
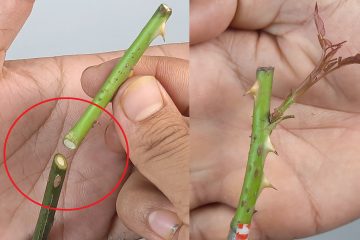
- Cut a 3-6 inch (7.5-15 cm) long piece from the end of the branch.
- Remove all leaves from the scion, leaving about 1 cm of the petiole (leaf stem) to protect the buds.
- Wrap freshly cut scions in a wet newspaper and place them in a plastic bag to keep them moist until grafting. Use them as soon as possible for best results.
-
Perform the Graft (Example: Veneer Grafting – high success rate):
-
Prepare the Rootstock:
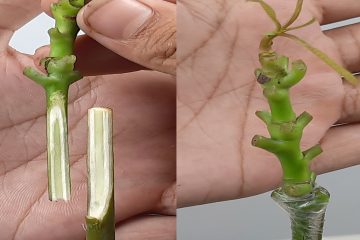
- Make a downward, shallow cut (about 1.5-2 inches long) on the side of the rootstock, exposing the cambium layer (the greenish layer just under the bark).
- At the bottom of this cut, make a small, horizontal inward cut to meet the downward cut, creating a small flap or notch.
-
Prepare the Scion:
- Make a long, sloping cut on one side of the scion, matching the length and angle of the cut on the rootstock.
- On the opposite side of the scion, make a shorter, corresponding cut to create a wedge shape that fits snugly into the rootstock’s notch.
-
Join Scion and Rootstock:
- Carefully align the cut surfaces of the scion and rootstock, ensuring the cambium layers (the living tissue just beneath the bark) of both pieces are in close contact. This is crucial for a successful union.
- If the scion and rootstock are not the exact same thickness, align them on one side.
-
Secure the Graft:
- Tightly wrap the joined area with grafting tape or a clear plastic strip, starting from below the cut and moving upwards, covering the entire graft union. This holds the parts together, prevents moisture loss, and protects from contamination. Do not cover the terminal bud of the scion.
-
-
Create a Humid Environment:
- Place a clear plastic bag over the entire grafted area, securing it at the bottom to create a mini-greenhouse effect. This helps maintain high humidity around the graft, preventing desiccation.
- If the grafted plant will be in direct sunlight, place a brown paper bag over the plastic bag to prevent excessive heat buildup.
-
Post-Grafting Care:
- Place the grafted plant in a warm, shaded area. Avoid direct sunlight.
- Water the rootstock regularly, but do not overwater, as the scion has no leaves to transpire water initially.
- Monitor for new growth (bud sprouting). This can take anywhere from 1 to 8 weeks.
- Once new leaves emerge and harden (turn green), you can gradually remove the plastic bag.
- Remove the grafting tape carefully once the graft union has fully healed and the new growth is well-established (usually a few weeks to a few months). Be careful not to damage the stem.
- Prune any suckers (new shoots) that emerge from the rootstock below the graft union, as these will compete with the scion.
- Harden your grafted seedling in a shade house for 6-8 weeks before transplanting it to a permanent location.
Success Rates:
- Success rates vary depending on the technique, timing, skill of the grafter, and the health of the plant material.
- Veneer grafting generally has a high success rate.
- Studies have shown success rates ranging from 70% to over 90% in ideal conditions and with specific varieties and techniques. For example, some studies report 80% success with the ‘Fazli’ scion and cleft grafting, and over 90% success with veneer grafting during optimal times.


