1. Choose the Right Time and Cutting:
- The best times to take rose cuttings are in the spring or fall when the plant isn’t in active bloom. Some gardeners find late fall to early winter (November to February) particularly successful.
- Select a healthy, non-flowering stem about the thickness of a pencil (5-9 inches long). Look for stems with at least three to five leaf nodes (the points where leaves emerge).
- Make your cuts with clean, sharp pruning shears to prevent disease and ensure a clean slice.
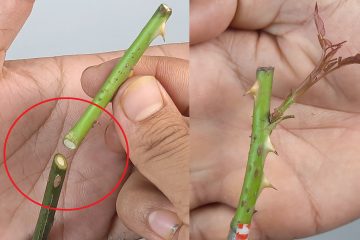
- Cut the top of the stem straight across, about ¼ inch above a node.
- Cut the bottom of the stem at a 45-degree angle, about ¼ inch below a node. This angled cut increases the surface area for root development.
2. Prepare the Cutting:
- Remove any flowers or buds from the cutting.
- Remove most of the leaves, leaving only the top one or two sets (2-4 leaves total). This helps the cutting focus its energy on root growth rather than supporting leaves.
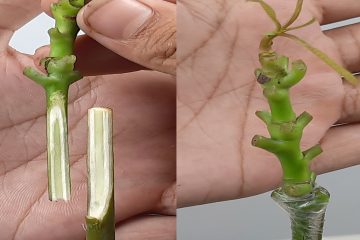
- (Optional) Wound the bottom inch of the cutting by making a few vertical slices through the green skin or gently scraping a strip or two. This can encourage rooting.
3. Encourage Rooting (Optional but Recommended):
- Rooting hormone powder can significantly improve your success rate. Moisten the bottom inch of the cutting and dip it into the powder, tapping off any excess.
- Some gardeners have also found success with natural rooting alternatives like honey or aloe vera, although scientific evidence is less conclusive.
4. Planting the Cutting:
- Use a small pot (at least 6 inches deep) with drainage holes.
- Fill the pot with a well-draining potting mix specifically for roses or a mix of equal parts potting soil and perlite or sand.
- Make a hole in the center of the soil with your finger or a pencil.
- Insert the cutting, sliced-side down, into the hole, ensuring that at least two nodes are buried. Be careful not to rub off the rooting hormone if used.
- Gently firm the soil around the cutting.
- Water thoroughly until the soil is moist but not waterlogged.
5. Create a Humid Environment:
- Cover the pot and cutting loosely with a clear plastic bag or a plastic bottle with the bottom cut off. This helps to retain moisture and create a mini-greenhouse effect. Ensure the plastic doesn’t touch the leaves.
- You can use a stake to keep the plastic elevated.
- Ventilate the cover briefly a couple of times a week to prevent excessive condensation and fungal growth.
6. Provide the Right Conditions:
- Place the pot in a location with indirect sunlight or under grow lights. Avoid direct, intense sunlight, which can scorch the cutting.
- Maintain a consistent soil moisture level. Water when the top inch of soil feels slightly dry. Avoid overwatering, which can lead to rot.
- Keep the cuttings in a warm environment (ideally between 70-80°F or 21-27°C).
7. Monitor and Be Patient:
- Roots typically form within 2-8 weeks, but it can sometimes take longer depending on the rose variety and conditions.
- You can gently tug on the stem after a few weeks to check for resistance, which indicates root development.
- New leaf growth is another sign that the cutting has rooted.
8. Transplanting (Once Rooted):
- Once the roots are well-established (you see roots emerging from the drainage holes or the plant shows significant new growth), you can transplant the new rose plant into a larger pot or directly into your garden.
- Harden off the new plant by gradually exposing it to outdoor conditions over a week or two before transplanting it permanently. Start with a few hours of shade and gradually increase sunlight exposure.
Simple Tips for Success:
- Take multiple cuttings as not all of them will root successfully.
- Keep the cuttings hydrated from the moment you take them until they are planted. You can place them in a glass of water temporarily.
- Use a sterile potting mix to prevent diseases.
- Label your cuttings with the rose variety and date planted.
Growing roses from cuttings takes a bit of patience, but following these simple steps can significantly increase your chances of success in creating new rose bushes for your home and garden!


