


That’s a fantastic idea! Making woolen flowers with a pencil is a popular and super easy hand embroidery trick that’s perfect for beginners. It’s often used to create small, fluffy, pom-pom-like flowers that can be used to embellish clothing, bags, headbands, or even for scrapbooking and card making.
Here’s a breakdown of how to do it:
Materials You’ll Need:
- Woolen Yarn/Embroidery Floss: Thicker yarn works well for fluffier flowers, while thinner embroidery floss can create more delicate ones. Choose your favorite colors!
- Pencil: A regular round pencil is perfect. The fatter the pencil, the bigger your flower will be.
- Embroidery Needle: A needle with an eye large enough to thread your chosen yarn.
- Fabric/Base Material: The fabric you want to embroider the flower onto (e.g., cotton, linen, felt).
- Scissors: For cutting yarn.
Steps for Making a Woolen Flower with a Pencil:
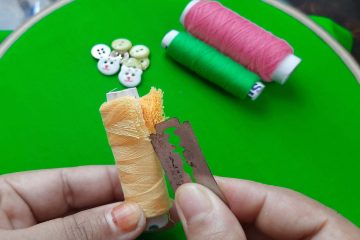
- Prepare your Yarn: Cut a generous length of woolen yarn. It’s better to have too much than too little.
- Wrap the Yarn Around the Pencil:
- Hold the pencil horizontally.
- Take one end of your yarn and secure it with your thumb on the pencil.
- Start wrapping the yarn snugly around the pencil, overlapping the previous wraps slightly. You’ll be creating a dense, compact bundle of yarn on the pencil.
- Wrap enough times to create the desired fullness for your flower. More wraps mean a denser, puffier flower.
- Secure the end of the yarn again with your thumb to prevent it from unraveling.
- Stitch Through the Wrapped Yarn:
- Thread your embroidery needle with a separate piece of yarn (preferably a matching color, or one that blends well). This will be your “tying” yarn.
- Carefully slide the needle underneath all the wrapped threads on the pencil, right in the middle of the wrapped section.
- Pull the tying yarn through, leaving a tail on one side.
- Now, bring the needle back over the top of the wrapped threads and slide it underneath again on the opposite side of the center.
- Pull the yarn through, and then tie a tight double knot on top of the wrapped threads, effectively cinching them together in the middle. This is what forms the center of your flower. Make sure it’s very secure.
- Carefully Remove from Pencil:
- Once the knot is tight, gently slide the wrapped yarn off the pencil. You’ll now have a figure-eight shape with a tight knot in the middle.
- Cut the Loops:
- With your scissors, carefully cut all the loops on both sides of the central knot. Be careful not to cut the knot itself.
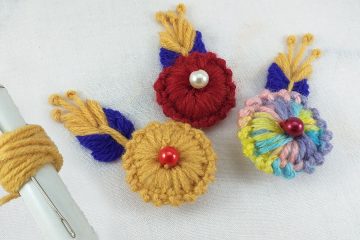
- Fluff and Shape:
- Once all the loops are cut, gently fluff out the cut yarn ends. You’ll start to see a flower shape emerge. You can use your fingers to shape it into a more rounded or open flower. Trim any unruly threads to make it even.
- Attach to Fabric (Embroidery):
- Using the two tails from your tying yarn (or a new piece of yarn if they are too short), thread them onto your needle.
- Position your woolen flower on your fabric where you want it to be.
- Push the needle with the tying yarn through the fabric from the front to the back.
- Secure the flower by tying a knot on the back of your fabric. You can also make a few small stitches through the center of the flower into the fabric to make it extra secure.
Tips for Amazing Results:
- Vary Yarn Thickness: Experiment with different weights of yarn for different effects. Bulkier yarns create larger, more pronounced flowers.
- Multiple Colors: Use two or more colors of yarn for a variegated effect in your flower. Wrap them together!
- Tighter Wraps: The tighter you wrap the yarn, the denser and more compact your flower will be.
- Fluffing is Key: Don’t be afraid to really fluff out the cut ends. This is what gives the flower its soft, full appearance.
- Add a French Knot Center: Once the flower is attached, you can add a small French knot in the very center with embroidery floss for an extra touch of detail.
- Leaves: Stitch a few simple leaf shapes around the base of your woolen flower using green embroidery floss.
- Practice: Like any craft, practice makes perfect. Your first few might be a bit wonky, but you’ll quickly get the hang of it!