This method offers the highest success rate for lemon trees.
1. Selecting and Preparing Cuttings:
- Timing: As mentioned, late spring to early summer is ideal.
- Choose Healthy Wood: Look for “semi-hardwood” cuttings. These are shoots from the current season’s growth that have started to mature and are no longer soft and green, but haven’t become fully woody and bark-covered yet. They should be flexible but snap if bent too sharply.
- Length: Cuttings should be 6-8 inches (15-20 cm) long, with at least 3-4 nodes.
- Make Clean Cuts:
- Use sharp, sterilized pruning shears or a knife. Sterilize with rubbing alcohol to prevent disease.
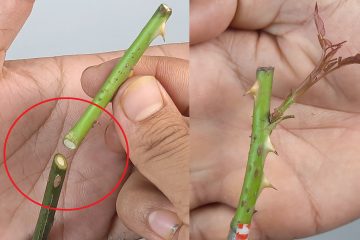
- Make a 45-degree angled cut just below a node at the bottom of the cutting. This increases the surface area for root development.
- Make a straight cut just above a node at the top of the cutting.
- Remove Lower Leaves: Remove all leaves from the bottom half to two-thirds of the cutting. This prevents the leaves from rotting in the rooting medium and reduces water loss (transpiration). Leave 2-4 leaves at the top. If the remaining leaves are very large, you can cut them in half horizontally to further reduce moisture loss.
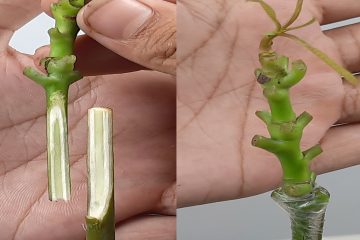
- Scrape the Bark (Optional but Recommended): Gently scrape a small strip (about 1 inch) of the outer bark off the very bottom of the cutting on one side. This exposes more cambium layer, which is where roots form.
- Rooting Hormone: Dip the bottom 1-2 inches of the cutting into a rooting hormone (liquid or powder containing IBA or NAA). Tap off any excess powder. This significantly improves rooting success.
2. Preparing the Rooting Medium:
- Excellent Drainage is Key: Lemon cuttings are prone to rot if the medium stays too wet.
- Best Mixes:
- Perlite: 100% perlite is often highly successful due to its excellent aeration and drainage.
- Peat Moss and Perlite/Coarse Sand: A 50/50 mix is also very effective.
- Coconut Coir and Perlite: Another good, sustainable option.
- Best Mixes:
- Container: Use small pots (4-6 inches) or a propagation tray with plenty of drainage holes.
- Moisten the Medium: Pre-moisten your chosen rooting medium until it’s evenly damp but not soggy. Squeeze a handful; only a few drops of water should come out.
3. Planting the Cuttings:
- Create Holes: Use a pencil or stick to make holes in the moistened rooting medium before inserting the cuttings. This prevents rubbing off the rooting hormone.
- Insert Cuttings: Carefully place the prepared cuttings into the holes, ensuring that at least one or two nodes are buried beneath the surface. Firm the medium gently around the base of each cutting to ensure good contact.
- Space: Give each cutting enough space so that leaves don’t touch each other, which can promote fungal growth.
4. Creating a Humid Environment (Crucial for Success):
Since cuttings have no roots, they can’t draw water from the soil. High humidity prevents them from drying out.
- Humidity Dome/Plastic Bag: The most common and effective method is to cover the entire pot or tray with a clear plastic bag or a purpose-built humidity dome.
- Ensure the plastic doesn’t touch the leaves (you might need to support it with sticks).
- Seal the bag/dome around the rim of the pot to trap moisture.
- Intermittent Misting: You can also mist the inside of the humidity dome or plastic bag occasionally to maintain high humidity.
- Ventilation: Briefly open the plastic cover once a day for 5-10 minutes to allow for air exchange and prevent excessive condensation, which can lead to mold or rot.
5. Providing Optimal Conditions:
- Light: Place the pots in a location with bright, indirect light. Avoid direct sunlight, especially during the hottest part of the day, as it can scorch the leaves and overheat the enclosed environment. A north or east-facing window is often good, or a shaded outdoor area.
- Temperature: Maintain a consistent warm temperature, ideally between 70-85°F (21-29°C). A heating mat placed under the pots can significantly speed up rooting, especially in cooler climates or during cooler periods.
- Watering: The rooting medium should be consistently moist but never soggy. Check the moisture level regularly (by feeling the weight of the pot or gently sticking a finger in). Water sparingly when the top inch or two starts to feel dry. Bottom watering (placing the pot in a tray of water for 15-20 minutes) can be effective.
6. Patience and Transplanting:
- Rooting Time: Lemon cuttings can take anywhere from 4 to 12 weeks to root, sometimes longer. Don’t disturb them too often.
- Signs of Rooting: You’ll typically see new leaf growth on the cutting once roots have formed. You can also gently tug on a cutting; if it offers resistance, it’s likely rooted.
- Hardening Off: Once rooted, gradually acclimate the young plants to lower humidity over a week or two. Start by opening the plastic cover for a few hours each day, gradually increasing the time until it’s fully removed.
- Transplanting: Once the roots are well-developed (several inches long) and the plant is actively growing, carefully transplant it into a larger pot (1-gallon size is a good start) with a good quality, well-draining citrus potting mix. Avoid disturbing the delicate new roots too much.


